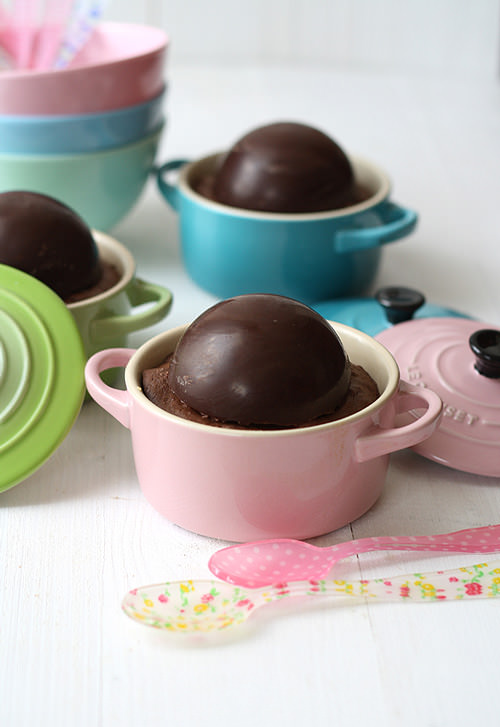
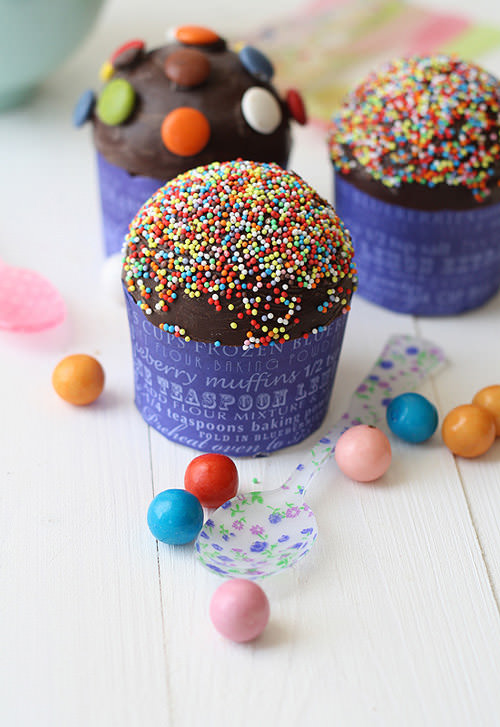
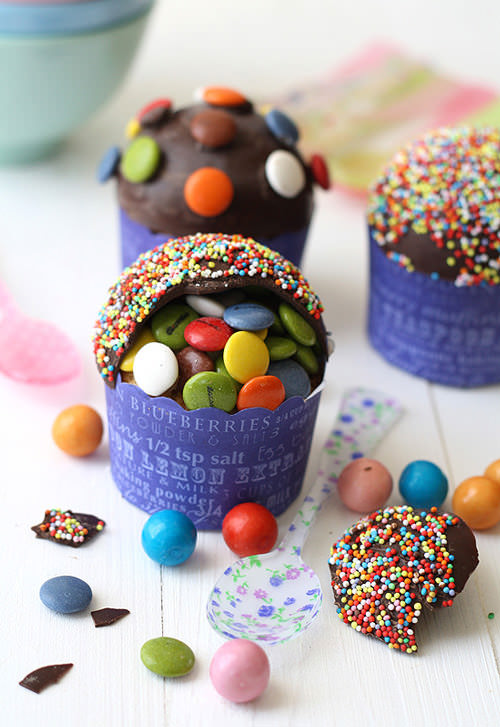
Here's another great twist on traditional pinatas. These cupcakes from La Receta de la Felicidad via Rachel of Handmade Charlotte are adorable, and probably a lot less messy than a giant Dora the Explorer full of confetti and candy.
Simply add a chocolate dome to your cupcakes or brownies, and voila! You have a sweet little hiding spot for candy.
images via Handmade Charlotte
Showing posts with label brownies. Show all posts
DIY Valentine's Brownie Toppers
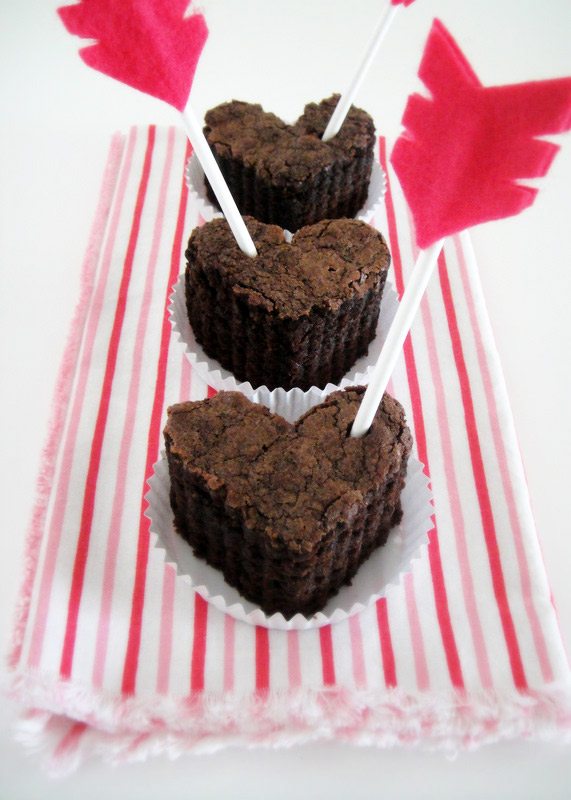
It's so easy to dress up treats and make them seem even more special. These arrow brownie toppers by Cyd of The Sweetest Occasion are a perfect example. You can whip up a batch of brownies or buy some, cut them with a heart cutter, and top them off with these felt arrows.
The steps are simple enough, so be sure to check out The Sweetest Occasion for the full tutorial.
Guest Desserts: Long-Distance Baby Shower
Today's Guest Desserts feature comes from Oslo by way of San Francisco. Even though Truc Luu of Treats lives in California and works in Finance at Gap, Inc., it's obvious she has a creative side as well. Inspired by some of my designs, the party invite, and some brown and pink ribbon, she set out to create a dessert table for her friend's baby shower in Norway.
According to Truc, baby showers are an emerging trend in Norway. Many Norwegians believe it's bad luck to give a baby gifts before birth. In this case, mom-to-be Elin didn't put too much stock in the superstition.

To ensure a picture perfect creation, Truc enlisted the help of some talented friends. Her Gap, Inc. co-worker, Michelle Padilla of NM Designs created the candy and dessert labels, while friend Anne-Marie Rabe photographed the design.

Truc made most of the desserts, including the cake layers, in San Francisco and shipped them in three checked suitcases during her trip to Oslo. Elin's friend Silja worked with Truc to make the cupcakes, brownies, and macarons once she landed in Oslo.
I love this color palette, and the crisp, white plates really pop against the dark brown tabletop. I think it's amazing that Truc was able to plan and execute this design from thousands of miles away, and I can't wait to see the designs she creates in the future.
Truc asked for some feedback about her design, because she plans to create another table for the baby's Christening. With so many family members and friends spread all across the country, and even the world, it's just a matter of time before all of you aspiring dessert table designers find yourselves creating your own long distance design. So, I thought I'd provide a few general tips as well.
1) Send pictures, measurements, and color swatches to any of your faraway collaborators to be sure that you're all on the same page. When I designed this table for Nonpareil Magazine, I worked with French miniaturist Stephanie Kilgast of Petit Plat via email to make sure that her miniature dessert table was a perfect replica of the full-sized Alice in Wonderland design I created.
2) Make sure you get a full, straight-on shot of the entire table. It will be an invaluable addition to your portfolio. You might have to move some furniture to get a wide enough shot of the design, so arrive early to set up and take the shots. Replace everything to its proper position, and be careful not to break anything.
3) Have a backup plan in place in case some of your platters and dishes break or your luggage is lost during the trip. It may be difficult to find replacements once you get to your destination.
4) Be sure to wipe plates to remove any chocolate smudges and use a pastry brush to remove crumbs from hard-to-reach places. Check the tabletop for any spilled sugar or debris prior to taking your photo. I know it sounds nit-picky, but your clients will expect you to be a perfectionist with an eye for detail. Your portfolio will benefit from your precision.
Do you have a dessert table, recipe, or DIY project to share? Visit the Submissions page.
According to Truc, baby showers are an emerging trend in Norway. Many Norwegians believe it's bad luck to give a baby gifts before birth. In this case, mom-to-be Elin didn't put too much stock in the superstition.

To ensure a picture perfect creation, Truc enlisted the help of some talented friends. Her Gap, Inc. co-worker, Michelle Padilla of NM Designs created the candy and dessert labels, while friend Anne-Marie Rabe photographed the design.

Truc made most of the desserts, including the cake layers, in San Francisco and shipped them in three checked suitcases during her trip to Oslo. Elin's friend Silja worked with Truc to make the cupcakes, brownies, and macarons once she landed in Oslo.
I love this color palette, and the crisp, white plates really pop against the dark brown tabletop. I think it's amazing that Truc was able to plan and execute this design from thousands of miles away, and I can't wait to see the designs she creates in the future.
Truc asked for some feedback about her design, because she plans to create another table for the baby's Christening. With so many family members and friends spread all across the country, and even the world, it's just a matter of time before all of you aspiring dessert table designers find yourselves creating your own long distance design. So, I thought I'd provide a few general tips as well.
1) Send pictures, measurements, and color swatches to any of your faraway collaborators to be sure that you're all on the same page. When I designed this table for Nonpareil Magazine, I worked with French miniaturist Stephanie Kilgast of Petit Plat via email to make sure that her miniature dessert table was a perfect replica of the full-sized Alice in Wonderland design I created.
2) Make sure you get a full, straight-on shot of the entire table. It will be an invaluable addition to your portfolio. You might have to move some furniture to get a wide enough shot of the design, so arrive early to set up and take the shots. Replace everything to its proper position, and be careful not to break anything.
3) Have a backup plan in place in case some of your platters and dishes break or your luggage is lost during the trip. It may be difficult to find replacements once you get to your destination.
4) Be sure to wipe plates to remove any chocolate smudges and use a pastry brush to remove crumbs from hard-to-reach places. Check the tabletop for any spilled sugar or debris prior to taking your photo. I know it sounds nit-picky, but your clients will expect you to be a perfectionist with an eye for detail. Your portfolio will benefit from your precision.
Do you have a dessert table, recipe, or DIY project to share? Visit the Submissions page.
Filed:
baby shower,
brown,
brownies,
cake,
candy,
cupcakes,
guest desserts,
macarons,
pink
3
Comments
Dessert Table: A Totally Target Halloween
I'm so excited to share my latest dessert table with you today. I'm doubly thrilled, because Kathleen of Twig & Thistle is kindly featuring it on her blog, as well. You might remember these behind-the-scenes sneak peeks from a couple of weeks ago. Well, photog Emily Steffen's beautiful pics capture the table and the beautiful forest much better.
The Totally Target Halloween dessert table is just that. A dessert table designed using ingredients, supplies, dishware, and desserts that are all available right now at your local Super Target. Target is headquartered here in Minneapolis, so it has a pretty big presence in the area. But, it's also easy to find Target stores across the U.S., making this design a really affordable option for your Halloween bash.
Target's black cake stands make the perfect pedestals for two great cakes. You can use a favorite family recipe or a boxed mix to make both. Target's bat cookie cutters and black sparkly decorating icing (in the baking aisle) add flourish to this chocolate cake. Jumbo and mini marshmallows transform into cute ghosts when you add chocolate jimmies for the eyes for this vanilla cake.
I used these great jars to hold licorice and black raspberry gummies. Target's white and milk chocolate truffles and candy corn go along with the chocolate-covered rice crispy treat tombstones and chocolate-covered Oreos I made.
To display several of the treats, I wanted to create ceramic-looking platters. I used Target's black gift wrap to cover box lids and risers to mimic the reflective quality of traditional china. You can use books or any other flat surface to raise your treats to differing heights.
favor bags: Two brown paper lunch bags make great favor sacks. Simply shred one and place another un-shreeded bag inside of it. Fill the inner bag with lots of sweet treats, insert a stick, and tie the bag closed with twine or other natural-looking string or ribbon.
skull & bone chocolates: I couldn't find the perfect spooky chocolates, so I used Target's skull & bones ice cube trays as molds to make custom white chocolates.
cupcakes: These brain cupcakes were surprisingly easy to make using buttercream and a frosting tip. You can bake them from scratch using ingredients, a box mix, or pre-made cupcakes, all of which can be found at Super Target.
brownie pops: These brownie pops are incredibly simple. Bake your own brownies, buy a mix, or use Target's Market Pantry brownie bites from the bakery section. Roll a golf ball-sized portion into a ball, insert lollipop stick, and dip into melted white chocolate. I alternated the spider web flags I designed with ones that say "Boo!," "Beware," and "Howl" to add a finishing touch to each pop.
I also designed "Trick or Treat" wrappers to dress up standard chocolate bars. I painted Target's butter dish black to display the chocolate bars, while a gothic goblet housed black-speckled jelly beans.
Invite designer and budding stylist Bethany Hway created these invites, which are inspired by the chocolate bar wrappers I created. I love how well they coordinate with the bars and brownie pop labels without exactly mimicking them.
Thank you so much for sharing my design with your readers, Kathleen! Please head on over to Kathleen's blog, Twig & Thistle (one of my daily must-reads), to download the chocolate bar wrapper and brownie pop flags I designed. You can also download and print the invitation that Bethany Hway designed. Don't forget to stop by photog Emily Steffen's blog for even more photos from this shoot.
If you're visiting the Sweet Tooth blog from Twig & Thistle, thanks for stopping by. You can check out my other designs on my website or follow me on Twitter and Facebook.
*Target, Corp. in no way compensated me for this post. I am not now, nor have I ever been, employed by Target Corp. or any of its affiliates*
The Totally Target Halloween dessert table is just that. A dessert table designed using ingredients, supplies, dishware, and desserts that are all available right now at your local Super Target. Target is headquartered here in Minneapolis, so it has a pretty big presence in the area. But, it's also easy to find Target stores across the U.S., making this design a really affordable option for your Halloween bash.
Target's black cake stands make the perfect pedestals for two great cakes. You can use a favorite family recipe or a boxed mix to make both. Target's bat cookie cutters and black sparkly decorating icing (in the baking aisle) add flourish to this chocolate cake. Jumbo and mini marshmallows transform into cute ghosts when you add chocolate jimmies for the eyes for this vanilla cake.
I used these great jars to hold licorice and black raspberry gummies. Target's white and milk chocolate truffles and candy corn go along with the chocolate-covered rice crispy treat tombstones and chocolate-covered Oreos I made.
To display several of the treats, I wanted to create ceramic-looking platters. I used Target's black gift wrap to cover box lids and risers to mimic the reflective quality of traditional china. You can use books or any other flat surface to raise your treats to differing heights.
favor bags: Two brown paper lunch bags make great favor sacks. Simply shred one and place another un-shreeded bag inside of it. Fill the inner bag with lots of sweet treats, insert a stick, and tie the bag closed with twine or other natural-looking string or ribbon.
skull & bone chocolates: I couldn't find the perfect spooky chocolates, so I used Target's skull & bones ice cube trays as molds to make custom white chocolates.
cupcakes: These brain cupcakes were surprisingly easy to make using buttercream and a frosting tip. You can bake them from scratch using ingredients, a box mix, or pre-made cupcakes, all of which can be found at Super Target.
brownie pops: These brownie pops are incredibly simple. Bake your own brownies, buy a mix, or use Target's Market Pantry brownie bites from the bakery section. Roll a golf ball-sized portion into a ball, insert lollipop stick, and dip into melted white chocolate. I alternated the spider web flags I designed with ones that say "Boo!," "Beware," and "Howl" to add a finishing touch to each pop.
I also designed "Trick or Treat" wrappers to dress up standard chocolate bars. I painted Target's butter dish black to display the chocolate bars, while a gothic goblet housed black-speckled jelly beans.
Invite designer and budding stylist Bethany Hway created these invites, which are inspired by the chocolate bar wrappers I created. I love how well they coordinate with the bars and brownie pop labels without exactly mimicking them.
Thank you so much for sharing my design with your readers, Kathleen! Please head on over to Kathleen's blog, Twig & Thistle (one of my daily must-reads), to download the chocolate bar wrapper and brownie pop flags I designed. You can also download and print the invitation that Bethany Hway designed. Don't forget to stop by photog Emily Steffen's blog for even more photos from this shoot.
If you're visiting the Sweet Tooth blog from Twig & Thistle, thanks for stopping by. You can check out my other designs on my website or follow me on Twitter and Facebook.
*Target, Corp. in no way compensated me for this post. I am not now, nor have I ever been, employed by Target Corp. or any of its affiliates*
Filed:
bats,
bones,
brownies,
candy corn,
chocolate bars,
cupcakes,
cyber sweetness,
dessert table,
diy,
favors,
ghosts,
halloween,
invites,
printables,
pumpkins,
skulls,
target,
twig and thistle
20
Comments
Beautiful Brownie Bites
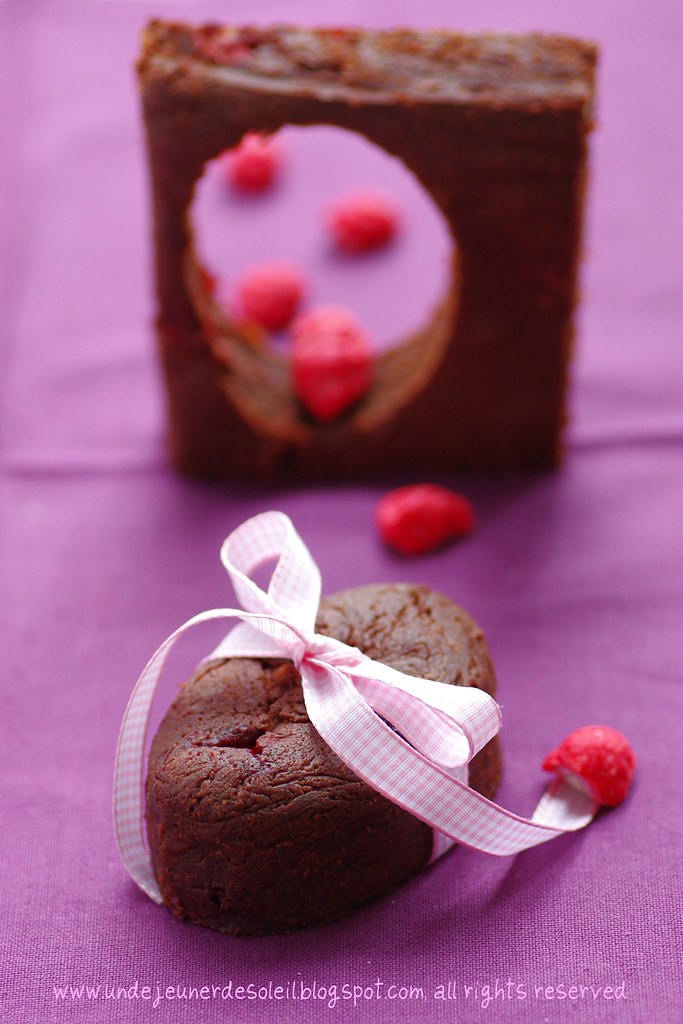
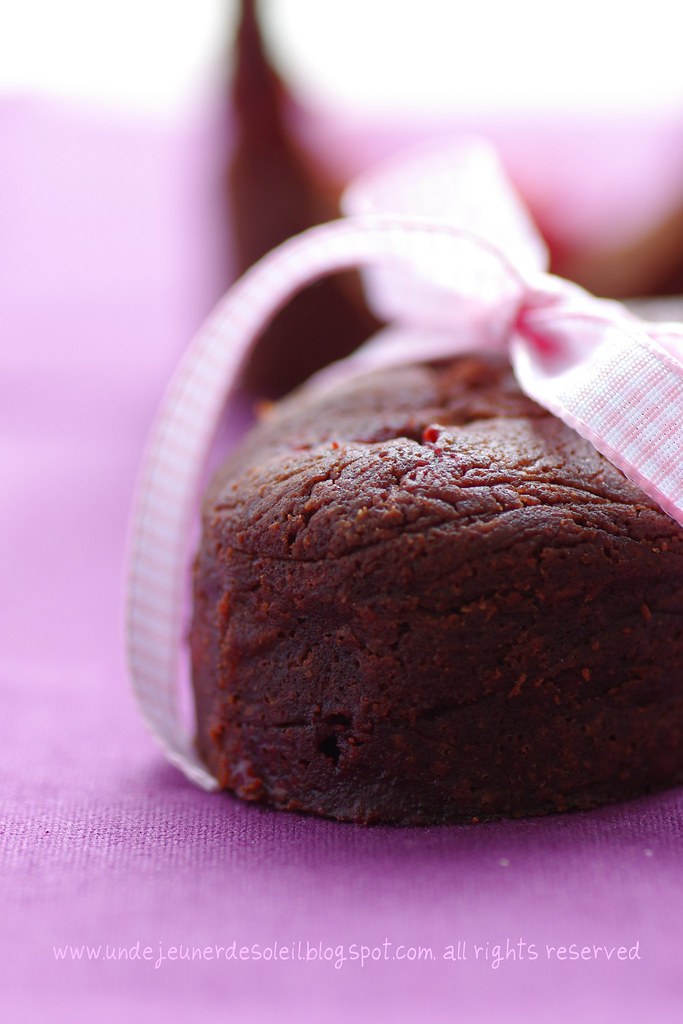
The presentation you use for your event is as important as the types of desserts you serve. Edde of Un Dejeuner de Soleil give the typical brownie bites get an elegant upgrade. When you use an oval cutter and color coordinated ribbon, these little beauties are wedding-ready.
Even though the recipe is in French and Italian, you can still use this inspiration combined with your traditional brownie recipe to recreate this gorgeous morsel.
Easy Lattice Brownies
I love the clean, preppy look of these black & white brownies. They are a sophisticated twist on the traditional swirl variety. Even better? Bakers Royale provided the recipe and the lattice technique so you can DIY. Check it out here.
DIY Valentine's Hearts II
Kathleen at Twig & Thistle must have read my mind before I posted this! She was already planning to update her super cute DIY Valentine's brownie bags for this year. So, for those of you, like me, who are too busy to redesign and print their own bag, check out Kathleen's updated template and tutorial here.
Thanks so much Kathleen!
DIY Valentine's Hearts
Valentine's Day is about a month away, and with a little planning you can give your loved ones more than another 99 cent card that you grabbed from Target on the way home. Twig & Thistle's DIY Valentine's brownie favors are a sweet gift.
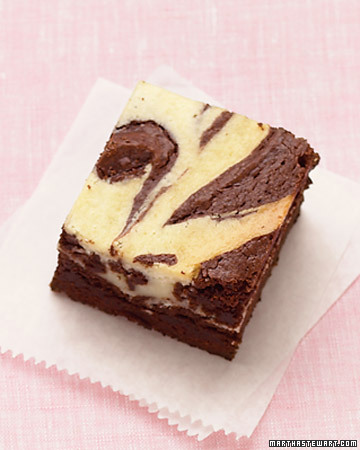
If you really want to put your own spin on the gift, try making Blondies, cheesecake, or another untraditional brownie.
Not a fan of brownies? These other heart-shaped sweets are easy and would look adorable inside this little baggie. Although the bag design is for last Valentine's (and the text can't be changed) you can still use it for inspiration in designing and printing your own bags from home.
Check out Twig & Thistle's design tutorial and printing tips to get all the details.
Brownies (Martha Stewart)
If you really want to put your own spin on the gift, try making Blondies, cheesecake, or another untraditional brownie.
Not a fan of brownies? These other heart-shaped sweets are easy and would look adorable inside this little baggie. Although the bag design is for last Valentine's (and the text can't be changed) you can still use it for inspiration in designing and printing your own bags from home.
Check out Twig & Thistle's design tutorial and printing tips to get all the details.
Brownies (Martha Stewart)
Subscribe to:
Posts (Atom)